在Windows中部署IoTSharp
本教程使用Sqlite 为数据存储 方式进行部署
下载
首先在 https://github.com/IoTSharp/IoTSharp/releases 或者 https://gitee.com/IoTSharp/IoTSharp/releases 中下载最新版本的安装包, 通畅Windows下的安装包 名为 IoTSharp.Release.win7-x64.zip 下载至本地。
直接启动
解压压缩包后, 我们可以看到里面 有一个 IoTSharp的Exe文件, 双击运行即可启动。 可以看到控制台启动, 启动后, 即可在浏览器中打开 http://localhost:2927 来访问。
注册为服务
IoTSharp 已经支持了Windows服务的方式运行, 如果有需要注册为Widnows服务, 你需要首先了解 https://docs.microsoft.com/zh-cn/windows-server/administration/windows-commands/sc-create , 使用sc 命令创建 为Windows服务,然后打开 http://localhost:2927 来访问
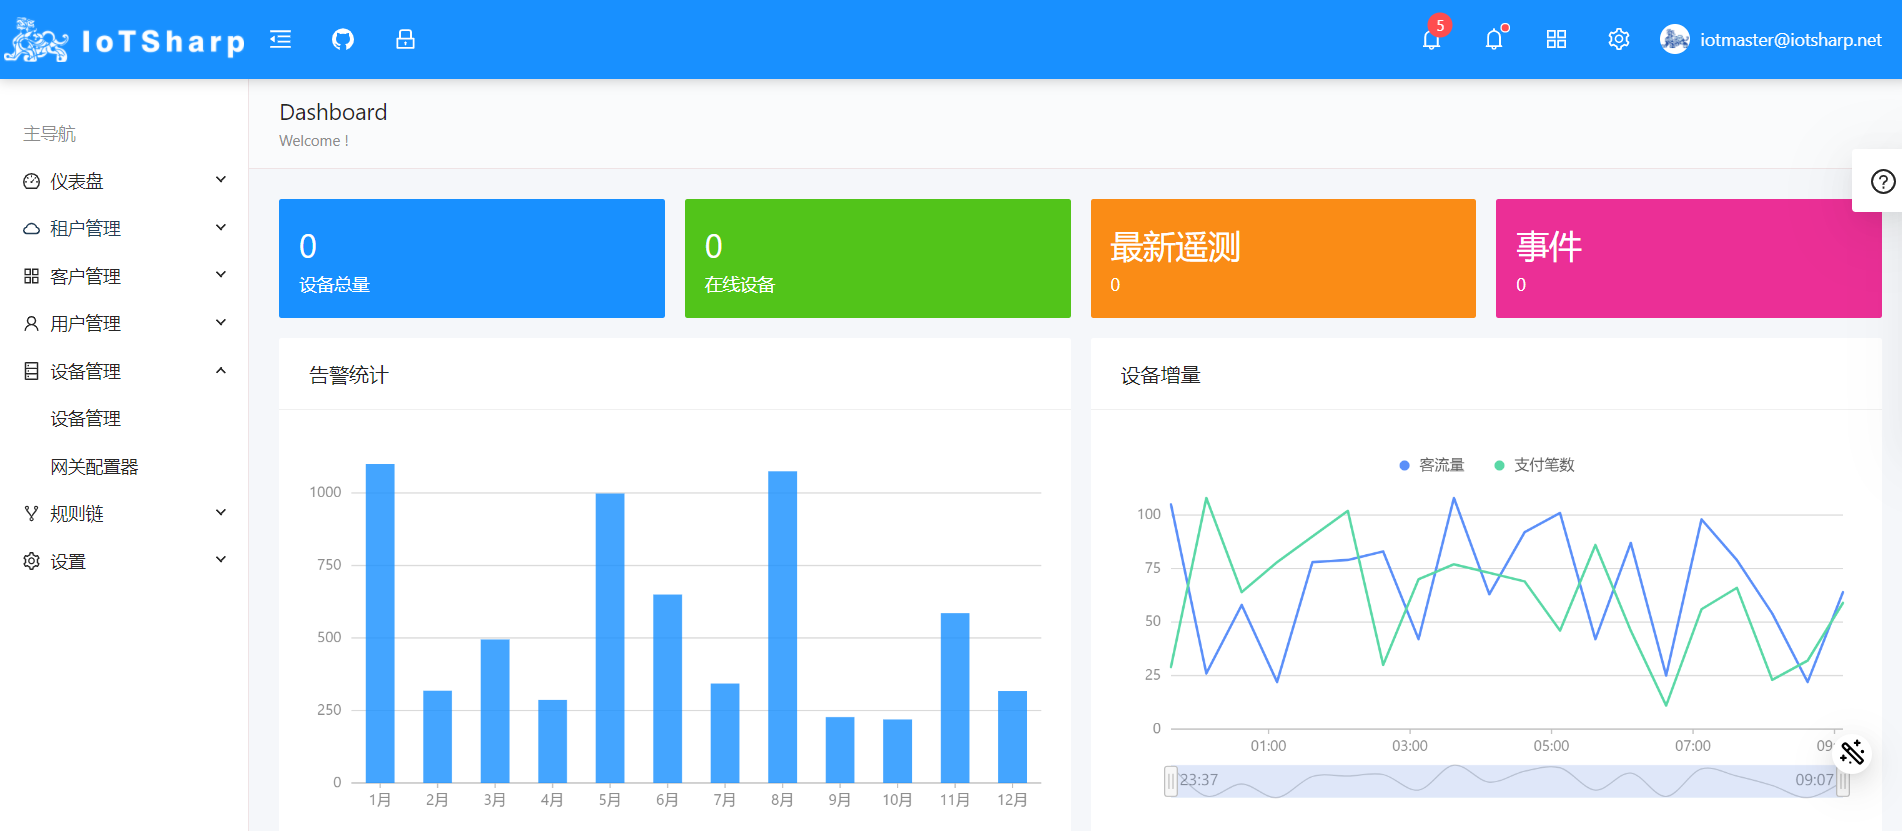
看到下图说明运行成功
初始化influxdb
浏览器访问 http://localhost:8086/,初始化influxdb
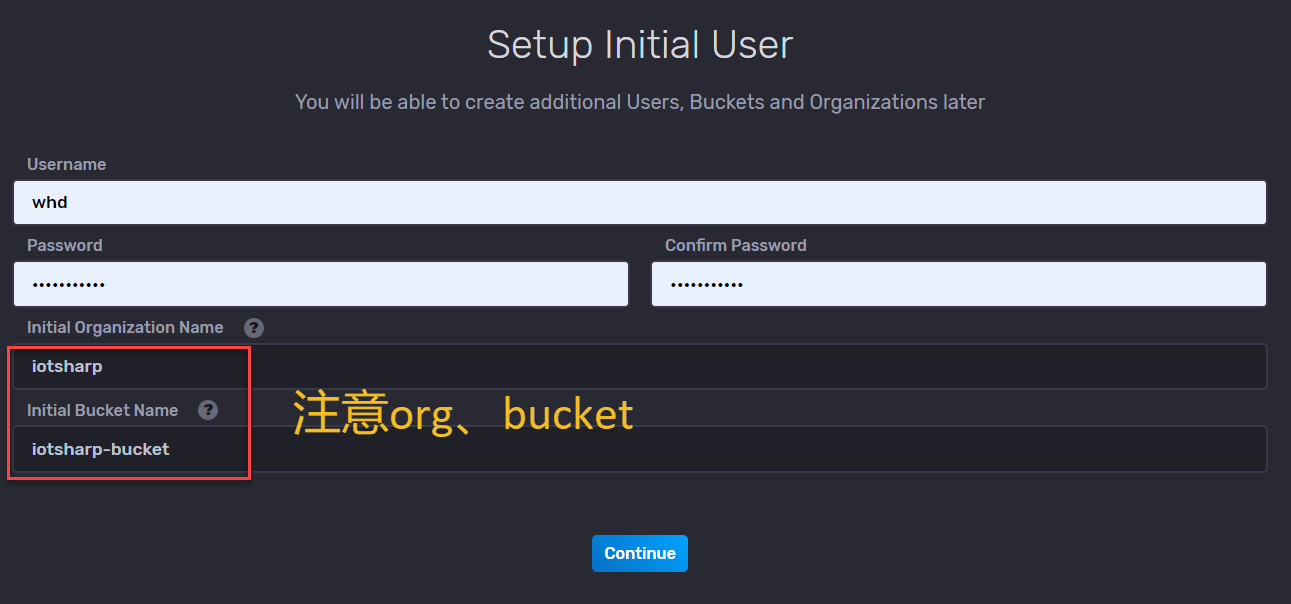
Org: iotsharp Bucket: iotsharp-bucket
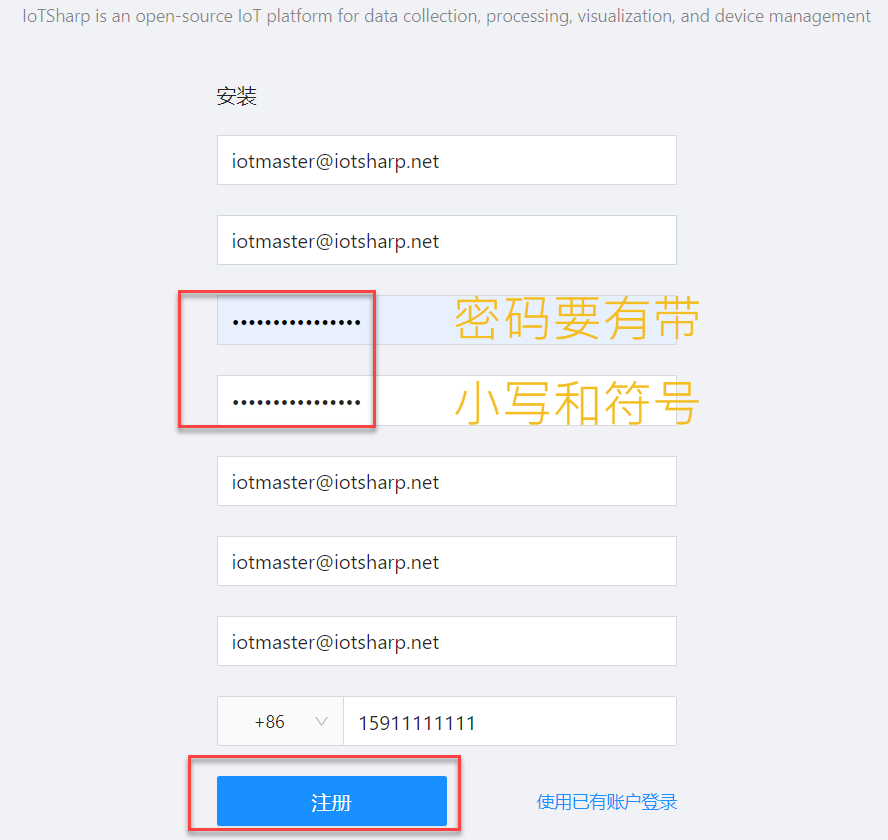
注册
Chrome浏览器访问 http://localhost:2927/
访问
注册后登入进入首页